
Imagine waking up to the sound of dripping water from your kitchen faucet, only to realize it’s been wasting gallons of water each day. Fixing leaks quickly is vital for your home’s efficiency, especially in Dalworthington, TX. By mastering a few faucet repair secrets, you can tackle this issue head-on and save both time and money. Ready to discover the essential steps to stop that annoying drip for good?
If your home is in Dalworthington, TX, or nearby, it’s always best to turn to trusted plumbing services in Dalworthington, TX when leaks arise or your fixtures need attention.
Identify the Type of Faucet You Have
How can you effectively tackle a faucet repair if you don’t know what type of faucet you have? Identifying your faucet is the first step to a successful repair.
There are several common types: compression, cartridge, ball, and ceramic disc. Each has unique components and mechanisms.
Start by examining the faucet’s handle. If it twists, you likely have a compression faucet. If it moves up and down, it’s probably a cartridge faucet. A ball faucet will have a single handle that controls both temperature and flow, while a ceramic disc faucet features two handles and a flat design.
Knowing the type helps you understand its inner workings and the specific parts needed for repair. Once you’ve identified the faucet, you’ll feel more confident as you proceed with the necessary repairs. Additionally, having an understanding of these details allows you to explain the issue more clearly when you turn to faucet repair & replacement services.
Gather Necessary Tools for the Repair
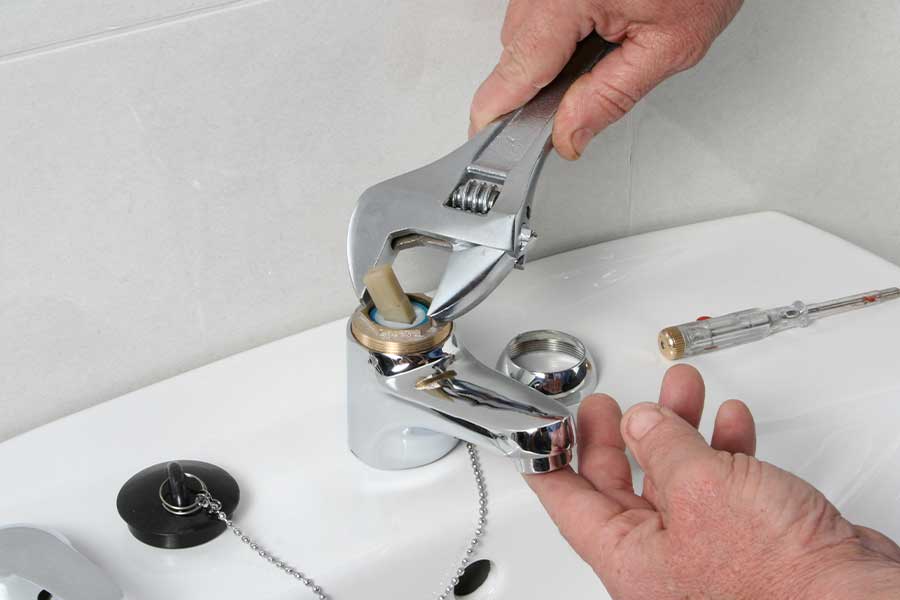
Before diving into your faucet repair, gather the essential tools to make the process smooth and efficient.
Start with an adjustable wrench to help loosen and tighten fittings. You’ll also need a flathead and Phillips screwdriver for removing screws and covers. Don’t forget a pair of pliers for gripping small parts or stubborn nuts.
A utility knife can be handy for cutting away old seals or tape, while a basin wrench is useful for reaching tight spaces under the sink.
Grab some plumber’s tape for sealing threads, and keep a bucket or towel nearby to catch any drips.
Finally, have replacement parts on hand, like washers or cartridges, specific to your faucet type. With these tools ready, you’re set to tackle that leak and restore your faucet to its former glory! Professional plumbers are equipped with all the necessary tools and can provide the expertise needed for repairs of any complexity.
Turn Off the Water Supply
Before you start your faucet repair, you need to turn off the water supply.
First, locate the shut-off valve under the sink or turn off the main supply if necessary.
After that, test the water flow to verify it’s completely shut off, so you can work safely. It’s important to follow safety protocols to protect your home during repairs. In some cases, locating the correct shut-off requires expert water leak detection.
Locate the Shut-Off Valve
Finding the shut-off valve is essential for tackling any faucet repair. This valve allows you to stop the water flow, making your repairs much easier and less messy.
Here’s how to locate it:
- Look under the sink: Check both hot and cold water lines.
- Check your home’s basement or crawl space: Valves may be located here for easy access.
- Inspect the wall: Some valves are installed inside walls, often behind access panels.
- Search near your water heater: There might be a shut-off near the heater itself.
- Ask for help: If you’re struggling, don’t hesitate to contact a professional plumber for guidance.
Once you’ve found the shut-off valve, you’re ready to proceed with your faucet repair confidently!
Turn off Main Supply
To guarantee a smooth faucet repair, it’s important to turn off the main water supply.
Locate the main valve, usually found near your water meter or where the water line enters your home. Once you find it, turn the valve clockwise until it’s fully closed.
This step prevents water from flowing through your pipes while you work, saving you from potential mess and frustration. If your faucet has a shut-off valve, you can use that instead, but turning off the main supply is the safest bet.
Remember to check for any leaks before you start your repair. Taking this precaution guarantees you won’t have to deal with unexpected water flow during the job, making your repair process more manageable.
Test Water Flow
Once you’ve turned off the main water supply, it’s crucial to test the water flow to guarantee the faucet is completely shut off.
This step guarantees you won’t have unexpected water gushes while working on repairs.
Here’s how to effectively test the water flow:
- Open the faucet: Turn on the faucet to see if any water trickles out.
- Check for drips: Look for any slow leaks while the faucet is open.
- Listen for sounds: Pay attention to any unusual noises, which may indicate a remaining water flow.
- Use a towel: Place a towel under the faucet to catch any stray drips.
- Confirm no pressure: Feel the faucet to verify no water pressure remains.
These steps confirm your faucet is ready for repair!
Disassemble the Faucet Carefully
Before you plunge into faucet repair, it’s crucial to disassemble the faucet carefully to avoid any damage. Start by turning off the water supply to prevent any unexpected leaks. Use a screwdriver to remove the handle, and remember to keep all screws and parts in a safe place.
If there’s a decorative cap, gently pry it off to access the screws underneath. As you take apart the faucet, take note of the order of the components. This’ll make reassembly much easier later on.
Don’t force any parts; if something’s stuck, try applying a little lubricant. Be mindful of washers and O-rings, as they can be easily damaged during disassembly.
Finally, take a moment to inspect the faucet body for any signs of corrosion or buildup. This careful approach will set you up for a successful repair and guarantee your faucet functions smoothly once reassembled. It’s a good idea to consider calling professionals for water leak detection if you suspect underlying plumbing issues.
Inspect and Replace Worn Washers
As you examine the components of your faucet, you’ll quickly notice that worn washers are often the culprits behind leaks and drips.
These small but critical pieces can wear out over time, leading to frustrating water waste.
Here’s how to inspect and replace them effectively:
- Turn off the water supply to your faucet before starting.
- Disassemble the faucet carefully, noting the order of parts for reassembly.
- Remove the old washer, checking for signs of wear or damage.
- Choose the right replacement washer; verify it matches in size and type.
- Reassemble the faucet, tightening everything securely to prevent future leaks.
Clean the Valve Seats
After replacing worn washers, the next step is to clean the valve seats. This vital part of the faucet can accumulate mineral deposits and grime, leading to leaks if not addressed.
Start by turning off the water supply to avoid any mess. Use a soft cloth or a fine-grit sandpaper to gently scrub the valve seats, removing any debris or buildup. If you notice significant corrosion or damage, consider using a specialized valve seat wrench for a more thorough clean.
After you’ve cleaned the seats, rinse them with water to eliminate any remaining particles. Once they’re dry, apply a small amount of plumber’s grease to guarantee a smooth seal when you reassemble the faucet.
Taking the time to properly clean the valve seats not only helps prevent future leaks but also extends the life of your faucet. Your efforts now will save you from more extensive repairs later.
Check O-Rings and Seals
Checking the O-rings and seals is essential in faucet repair, as these small components play a significant role in preventing leaks.
If your faucet’s leaking, worn or damaged O-rings and seals could be the culprit. Here’s what you need to do:
- Turn off the water supply: Always start by shutting off the water to avoid any mess.
- Remove the faucet handle: Carefully take off the handle to access the internal parts.
- Inspect the O-rings: Look for any signs of wear, cracks, or deformation that could cause leaks.
- Check the seals: Verify that the seals are intact and properly seated; any damage can lead to dripping.
- Replace if necessary: If you notice any issues, replace the O-rings and seals with new ones to restore proper function.
If you’re looking for additional expert advice, check out these smart and cost-effective faucet repair tips for further guidance from plumbing professionals.
Reassemble the Faucet With Care
When you’re ready to reassemble your faucet, keep your parts organized to avoid confusion.
Make certain to carefully follow the manufacturer’s instructions for a smooth process.
This attention to detail will help guarantee everything fits perfectly and functions as it should.
Organize Parts Systematically
As you prepare to reassemble your faucet, it’s important to organize the parts systematically to avoid confusion. A well-structured approach will save you time and minimize mistakes.
Start by laying out all components in the order you removed them. Consider using small containers or a magnetic tray to keep screws and small parts secure.
Here are some tips to help you stay organized:
- Group similar parts together (e.g., washers, screws)
- Label containers if needed for easy identification
- Keep tools handy for quick access
- Reference a photo you took during disassembly
- Double-check that you have all parts before reassembly
Following these steps will promote a smoother reassembly process and help prevent issues down the line.
Follow Manufacturer Instructions
With all parts organized and ready, it’s time to focus on reassembling your faucet. Start by consulting the manufacturer’s instructions, as they provide essential guidance specific to your model.
Pay attention to the order of assembly, as each component plays a vital role in the faucet’s functionality. Make certain to align parts accurately to avoid leaks or malfunctions later.
As you piece everything together, tighten screws and fittings gently to prevent damage. Don’t rush; take your time to verify everything fits properly.
Once reassembled, test the faucet by turning on the water to check for leaks. This careful approach not only guarantees a successful repair but also extends the life of your faucet.
Turn On the Water Supply and Test
After you’ve completed the necessary repairs on your faucet, it’s vital to turn on the water supply and test for leaks. This step guarantees your hard work pays off and that everything functions smoothly.
Here’s what you should do:
- Slowly turn on the water supply to avoid sudden pressure that could damage the faucet.
- Check all connections for any signs of leaks, especially around the base and under the sink.
- Test the faucet handle to verify it operates correctly and doesn’t stick.
- Observe the water flow to confirm it’s steady and without interruptions.
- Listen for any unusual sounds, like dripping or hissing, which could indicate a leak.
Taking these steps will help you catch any issues early.
If you notice any leaks, don’t hesitate to address them right away to avoid further damage. Happy testing!
Schedule Regular Maintenance to Prevent Future Leaks
To keep your faucet in top shape, regular maintenance is key.
Scheduling routine checks helps you catch potential issues before they turn into costly leaks.
Plus, professional inspections can provide peace of mind, ensuring everything’s working as it should.
Importance of Routine Checks
Regular maintenance checks are essential for preventing future leaks in your plumbing system.
By routinely inspecting your faucets and plumbing, you can catch small issues before they become major problems.
Here’s what you should focus on during your checks:
- Look for signs of dripping or pooling water.
- Check the integrity of washers and O-rings for wear.
- Inspect faucet handles for smooth operation.
- Examine pipes for signs of corrosion or damage.
- Guarantee all connections are tight and secure.
Benefits of Professional Inspections
Catching small issues during routine checks can save you from significant headaches down the line.
When you schedule professional inspections with a trusted plumbing specialist, you’re investing in long-term peace of mind. Their expert technicians use the latest tools and techniques to identify potential problems before they escalate into costly repairs.
Regular maintenance helps guarantee your faucets and plumbing systems function at their best, preventing unexpected leaks and inconveniences. You’ll also benefit from transparent communication and trustworthy recommendations tailored to your needs.
Plus, with guaranteed satisfaction on every service call, you can rest easy knowing you’re in good hands. Prioritize your comfort and convenience by making professional inspections a part of your home maintenance routine.
Next Steps for Leak-Free Living
By mastering these faucet repair secrets, you’re not just fixing leaks; you’re safeguarding your home’s integrity, much like a vigilant guardian standing watch over a cherished treasure. Each tool in your hand symbolizes empowerment, turning frustration into triumph. As you tighten those screws and replace worn parts, you’re weaving a tapestry of comfort and security. So, embrace these skills, and let your home flow smoothly, reflecting the care and attention you invest in it.For professional help or to keep your home reliable and leak-free, don’t hesitate to schedule your faucet repair appointment whenever you need an expert’s hand.